FatFs bare-metal porting to STM32F4xx
In this post I will describe how I adapted the FatFs library to the SDIO (SD Card) port of a STM32F4xx family microcontroller. The code is bare-metal programming, directly writing to the registers, with no usage of external libraries.
What is FatFs library
It is a library developed by ChaN, implementing the FAT formatting over virtually any memory mass device. It is useful for microcontrollers or any other usage where no operating system, taking care of formatting, is available. The official website for FatFs is the following:
http://elm-chan.org/fsw/ff/00index_e.html
Browsing in the Internet you can find many porting on different platforms; I thought to wrote this project, hoping it will be useful for somebody, because I couldn't find any bare-metal implementation for STM32F4 microcontrollers.
How to make FatFs port for your needs
FatFs is totally independent on the disk I/O layer; what the programmer is required to do, when integrating it on his/her project, is to write a few functions implementing disk initialize, disk read and disk write.
Where is the source code?
You can download the source code here: fatfs-stm32f4-v2.tgz
If you prefer, you can clone the github repository: https://github.com/colosimo/fatfs-stm32
It is based on FatFs v13. The value added, with respect to bare v13, is in the file source/diskio_stm32f4xx.c: it contains all is necessary for the porting.
Along with the FatFs library (in source/), you will find the kim/ subdirectory: together with the main.c, it contains the code for a simple demo, showing the library running properly.
How is my code configured for the HW
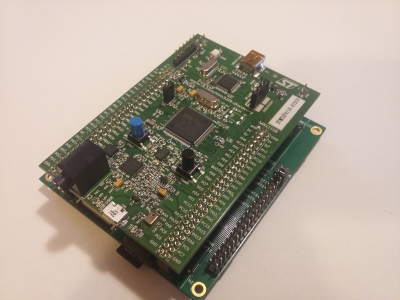
The implementation here described is hard-coded to work on official ST evaluation boards: STM32F411E-DISCO and DM-STF4BB ("Discovery more") board.
Here is a picture of the hardware I used:
It is quite simple to modify the code for your needs.
The disk_initialize function (in source/diskio_stm32f4xx.c) sets the proper GPIO settings for the SDIO pins:
/* SDIO_CD: input gpio, card detect */
gpio_func(IO(PORTB, 15), 0);
gpio_dir(IO(PORTB, 15), 0);
gpio_mode(IO(PORTB, 15), PULL_NO);

/* SDIO_D0 */
gpio_func(IO(PORTC, 8), 12);
gpio_mode(IO(PORTC, 8), PULL_NO);

/* SDIO_D1 */
gpio_func(IO(PORTC, 9), 12);
gpio_mode(IO(PORTC, 9), PULL_NO);

/* SDIO_D2 */
gpio_func(IO(PORTC, 10), 12);
gpio_mode(IO(PORTC, 10), PULL_NO);

/* SDIO_D3 */
gpio_func(IO(PORTC, 11), 12);
gpio_mode(IO(PORTC, 11), PULL_NO);

/* SDIO_CK */
gpio_func(IO(PORTC, 12), 12);
gpio_mode(IO(PORTC, 12), PULL_NO);

/* SDIO_CMD */
gpio_func(IO(PORTD, 2), 12);
gpio_mode(IO(PORTD, 2), PULL_NO);
In the file kim/init.c you can find the UART settings for log purpose:
int putchar(int c)
{
        if (c == '\n')
                putchar('\r');
        wr32(R_USART2_DR, c);
        while (!(rd32(R_USART2_SR) & BIT6));
        return c;
}

void init_uart(void)
{
        /* USART2 on PD5/PD6 */
        gpio_func(IO(PORTD, 5), 7);
        gpio_func(IO(PORTD, 6), 7);
        gpio_mode(IO(PORTD, 5), PULL_NO);
        gpio_mode(IO(PORTD, 6), PULL_NO);
        /* fPCLK=42MHz, br=115.2KBps, USARTDIV=22.8125, see table 80 pag. 519 */
        wr32(R_USART2_BRR, (22 << 4) | 13);
        or32(R_USART2_CR1, BIT13 | BIT5 | BIT3 | BIT2);
        or32(R_NVIC_ISER(1), BIT6); /* USART2 is irq 38 */
}
How to compile the library
If you have a gcc toolchain compiled for ARM and a Unix system, you can easily
run make, and it will compile both the library and a sample demo binary:
colosimo@asus:~/fatfs-stm32f4$ make
arm-none-eabi-gcc -c -mthumb -Wall -Werror -Os -mcpu=cortex-m4 -mfpu=fpv4-sp-d16 -mfloat-abi=hard -ggdb -Isource -Ikim/include -o source/ff.o source/ff.c
arm-none-eabi-gcc -c -mthumb -Wall -Werror -Os -mcpu=cortex-m4 -mfpu=fpv4-sp-d16 -mfloat-abi=hard -ggdb -Isource -Ikim/include -o source/ffunicode.o source/ffunicode.c
arm-none-eabi-gcc -c -mthumb -Wall -Werror -Os -mcpu=cortex-m4 -mfpu=fpv4-sp-d16 -mfloat-abi=hard -ggdb -Isource -Ikim/include -o source/ffsystem.o source/ffsystem.c
arm-none-eabi-gcc -c -mthumb -Wall -Werror -Os -mcpu=cortex-m4 -mfpu=fpv4-sp-d16 -mfloat-abi=hard -ggdb -Isource -Ikim/include -o source/diskio_stm32f4xx.o source/diskio_stm32f4xx.c
arm-none-eabi-ld source/ff.o source/ffunicode.o source/ffsystem.o source/diskio_stm32f4xx.o -r -o ff-stm32f4-bigobj.o
arm-none-eabi-ar rs ff_stm32f4.a ff-stm32f4-bigobj.o
arm-none-eabi-ar: creating ff_stm32f4.a
arm-none-eabi-gcc -c -mthumb -Wall -Werror -Os -mcpu=cortex-m4 -mfpu=fpv4-sp-d16 -mfloat-abi=hard -ggdb -Isource -Ikim/include -o kim/init.o kim/init.c
arm-none-eabi-gcc -c -mthumb -Wall -Werror -Os -mcpu=cortex-m4 -mfpu=fpv4-sp-d16 -mfloat-abi=hard -ggdb -Isource -Ikim/include -o kim/kprint.o kim/kprint.c
arm-none-eabi-gcc -c -mthumb -Wall -Werror -Os -mcpu=cortex-m4 -mfpu=fpv4-sp-d16 -mfloat-abi=hard -ggdb -Isource -Ikim/include -o main.o main.c
arm-none-eabi-ld kim/init.o kim/kprint.o main.o ff_stm32f4.a -Tkim/stm32f4xx.ld -o ff_demo.elf
arm-none-eabi-objcopy -O binary ff_demo.elf ff_demo.bin
It will produce:
the library, in two different formats: archive, (ff_stm32f4.a) or "big object" (ff-stm32f4-bigobj.o), meaning a full object file you can link to your objects;
the demo application, in elf and binary format: ff_demo.elf and ff_demo.bin.
Running the ff_demo.bin sample application
Switch on or reset the board, with a micro SD Card inserted: it will create a demo file in the SD Card root, named "ff_demo.txt", with a dummy content, then will open it again and dump its content. Something like this:
[LOG] Hello from ff_demo
[LOG] card type: SD2
[LOG] card OCR: 0080ffc0
[LOG] I will now create file ff_demo.txt with a dummy content
[LOG] ff_demo.txt size: 41 bytes
[LOG] I will now try to open the file ff_demo.txt and dump its content here
[LOG] ----ff_demo.txt dump begin ----
This is a test file, created by ff_demo
[LOG] ----ff_demo.txt dump end   ----
Some tips about how to use the library
You can:
use the ff_demo as the base for your project;
compile and link the library to your project, by using the included ff.h as header file;
take the code and readapt it for your needs. License is MIT-style, so you can do whatever you want with the code, as long as you retain the notice about Author and Copyright.
Current Limitations and next steps
The current implementation does not make use of DMA: the transfers are done by the CPU. This limits the data rate, as the maximum clock speed was empirically found at 4MHz. A future improvement will involve the usage of DMA, for maximum performances.
The KIM ("Keep It Minimal") project
Here is the official repository for KIM, the place I publish my FOSS code targeted for MCUs, easily readaptable for many needs (like the ff_demo above):
Contribute
If you have any suggestion and/or want to contribute, please contact me.